
We LOVE to decorate in our house. My kids are constantly coloring, cutting, and taping decorations to our walls and windows. I’ve actually stopped decorating with “real” decorations because 1) crafting keeps their little hands busy, and 2) who has time for decorating, anyway?
One of our favorite holidays to decorate for is Valentine’s Day, and I’ve created a bunch of heart-themed snowflakes over the years. Hearts are pretty easy to cut out, and they’re a good example of a symmetrical shape for kids (and adults) who are just beginning to cut “fancy” snowflakes.
In this tutorial, I’ll walk you through one of my Valentine’s Day paper snowflake patterns (there are 10 designs total in the Valentine’s day paper snowflake bundle!) You can either follow along with the pattern, or experiment with drawing the hearts on yourself.
First - gather your supplies:
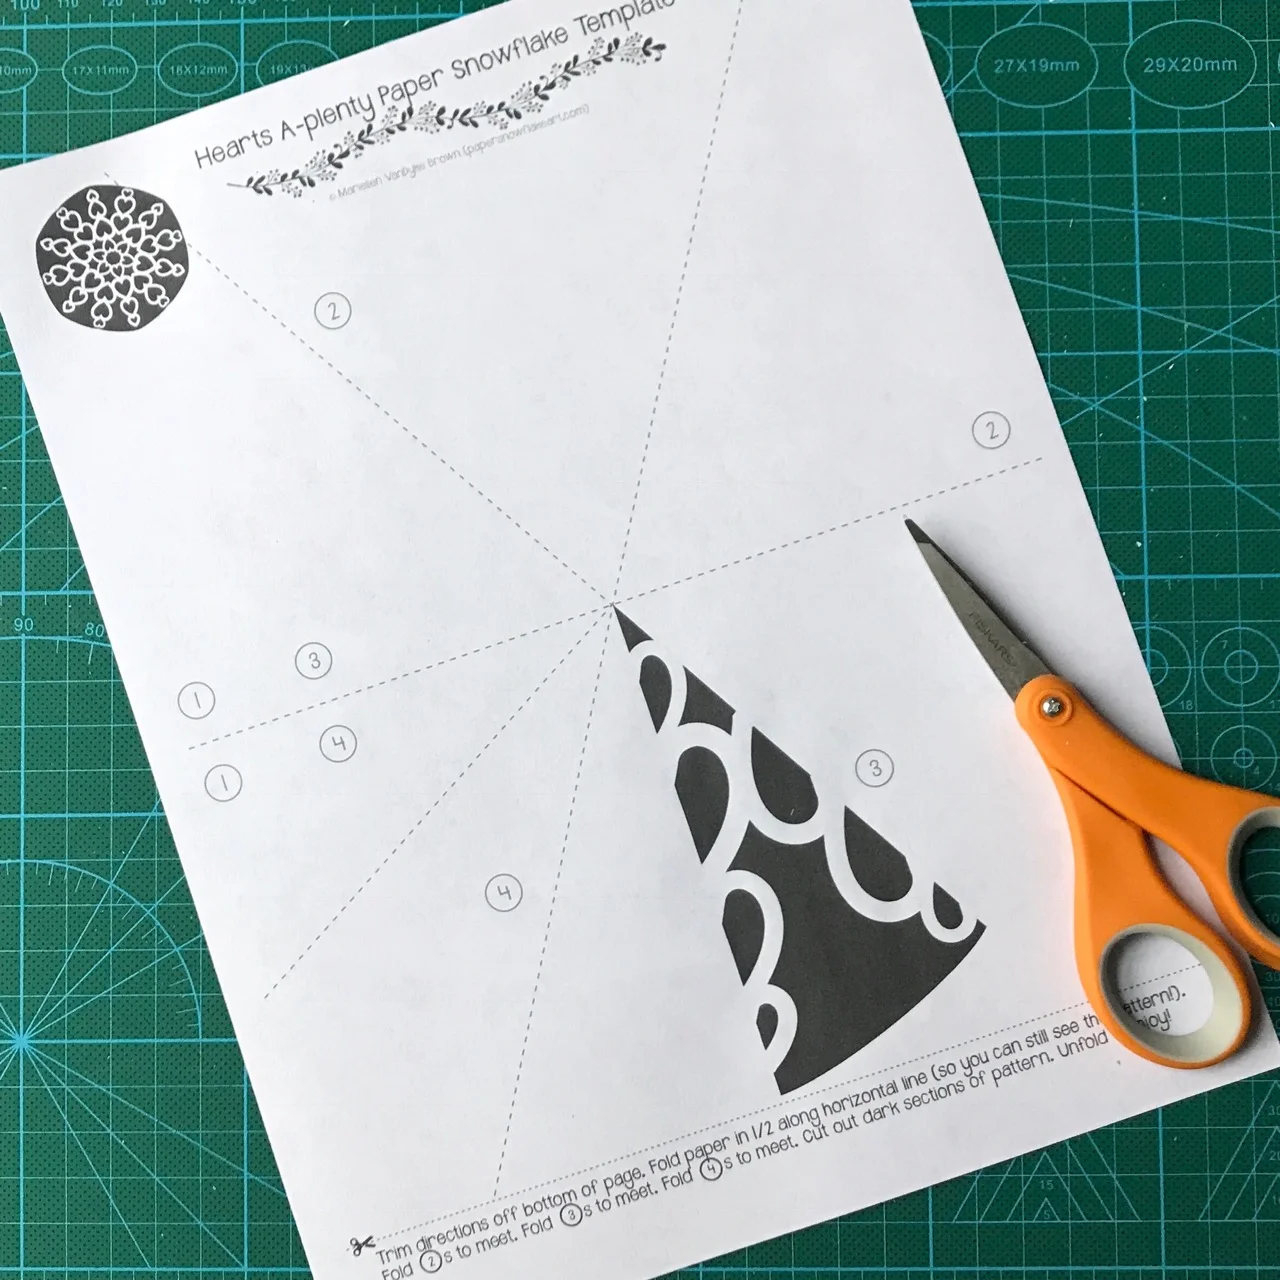
Download & print the Hearts A-Plenty Paper Snowflake Print-N-Cut
OR use 1 piece of paper - the thinner the better (I use 16lb Ecofficient Paper from HP)
sharp scissors
a pencil if you’re the sketch-it-out-first type
Folding your snowflake:
The paper snowflake patterns have directions on how to fold right on them, but I will list them here too.
1) Trim off the directions from the bottom of the page (so you can read them if you need to)
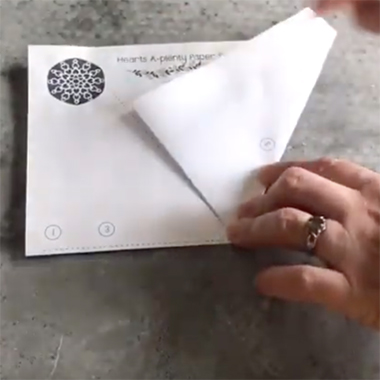
2) Fold the pattern in half across the dotted line by the number 1. You should still be able to see your pattern! I can’t tell you how many people fold their snowflake patterns so the pattern ends up on the inside and they can’t see it!
3) Fold #2 to line up with #2 (you’ll be folding it up at an angle).
4) Fold #3 to line up with #3 (you’ll be making your “pizza slice”)
5) Fold #4 to line up with #4 (you’ll be ready to cut!)

Cutting the template:
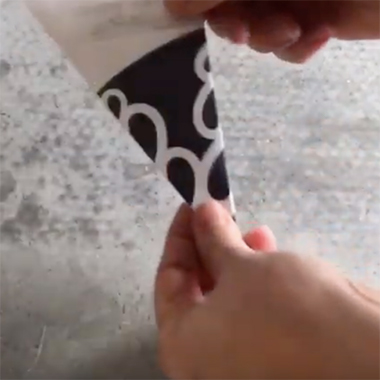
You will cut out all the dark sections of the paper snowflake pattern, and leave the white sections.
I always start by cutting out the insides of the hearts first. Start at the top inside of the heart and cut around and down to the bottom point of the heart. It’s easier to cut the curve of the heart in this way without risking snipping through some of the details.
After ALL of the insides of the hearts are cut out, you’ll cut around the outside.
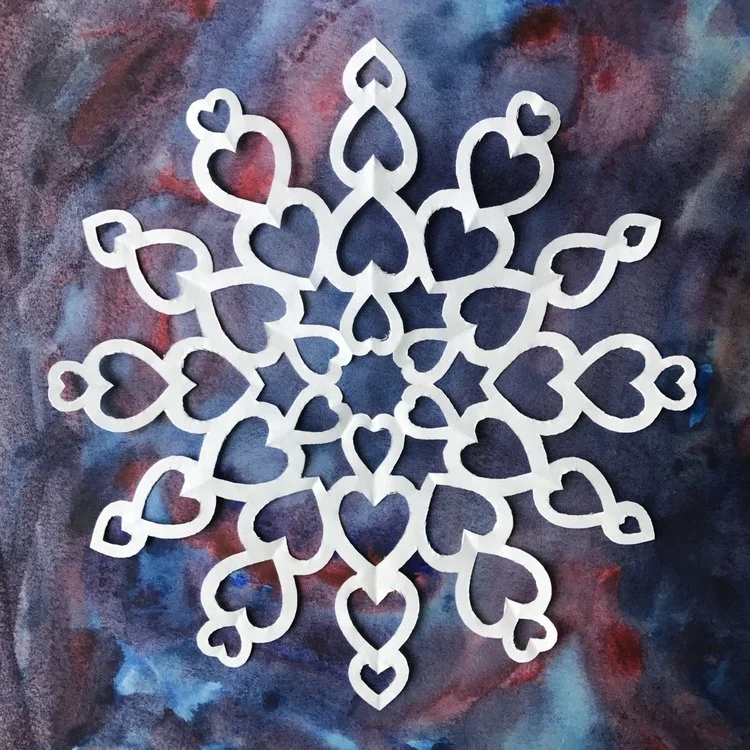
VOILA! Not so bad, right?
If you’re winging it without a template:
If you want to experiment with your own heart snowflake designs, you will start by folding a piece of blank paper (check out my step-by-step instructions on how to fold a paper snowflake if you need to!)
Then, you’ll just draw hearts (technically, you’ll draw HALF of a heart) wherever you’d like on your folded paper. Experiment with different sizes, swirls, hole punches, and see what happens!
A few paper snowflake cutting tips:
Give yourself more room than you think you’ll need. Delicate snowflakes are beautiful, but extremely challenging to cut!
Make sure you have sharp scissors!
Hold your snowflake VERY tight when you cut curves so the paper doesn’t slide around
Fun ideas for your heart snowflakes:
Cut out a bunch and dangle them from fishing line on the ceiling to surprise your valentine
Tape them to the top of a gift
Fold them up and send them inside a card to someone who lives far away
Cut out heart snowflakes as decorations for your school, office, or for a nursing home
Hang them in your windows or front door
Paint them with watercolors for a burst of beauty on these gray, snowy days
Paint a watercolor background and pop them into a square frame for an easy DIY gift
I hope you have fun snipping these snowflakes! If you have other ideas of heart designs or how to use your Valentine snowflakes, leave me a comment!